I had literally thousands of old family photos and knew that if I didn’t sort them out, no one ever would, and no one else would be able to identify some of the people. So I started work, and only evolved a satisfying way ahead as I proceeded, which meant I had to repeat lots of work and slowed the process down enormously. In case it would help you, if you too have a daunting mountain of unsorted family photos, I’m offering here the process I finally and painfully arrived at.
So – if you too have thousands of photos, first decide what will guide you in throwing away many more than you keep? For me, this meant prioritising pictures of people and only keeping photos of places where they had special meaning, for instance, somewhere we had lived, or something special had happened.
Second, if you have 6 nearly identical photos of your baby, only keep one good one.
Third, aim to have pictures of the different stages of your children’s lives, and decide if you are going to include pictures of them as adults and of their children. I decided on sticking to their childhoods – they can keep their own photos of adulthood and their families. This saved many hours of work! If I decide to include adulthood and grandchildren, that will be a separate project……..in the future, if ever.
Fourth, decide on categories for the photos you keep. So I had a category for each child “(child’s name) Childhood”; I had another called “earlier generations” which included great-grandparents and others; there was a category labelled “family together” because many pictures included all the children. And so on – you decide what works for you and you can flex as you go, but its good to work as soon as you can with categories which fit your purpose.
Process
1.Assemble your old unsorted photos
2.Get a table, and a big waste paper basket or similar for the rejects (be ruthless – photos of beautiful lakes you cannot even remember where they were are NOT worth keeping!)
3.Get e.g. old shoe boxes (you can buy them on line) and have tall cardboard dividers to label each section e.g. with a child’s name. Put the photos in the shoe boxes standing upright. The dividers have to be taller than the photos to be useful. Or you could skip the shoe boxes and just go to folders – see 6 below - but I found the shoe boxes useful.
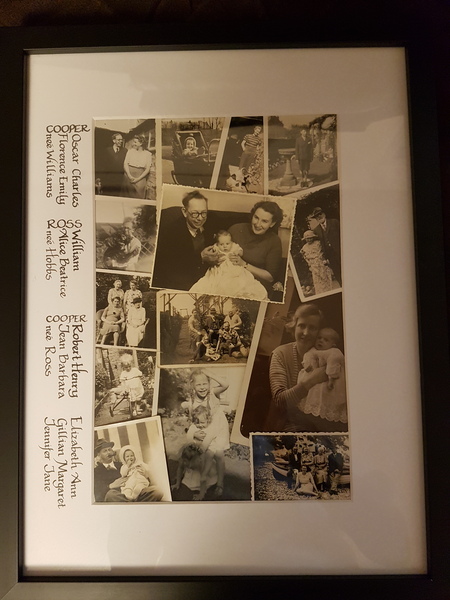
4.Start sorting and throwing away. Write on the back of each photo you keep – make sure you put names and if possible dates and places, but its names which matter most. Scan the photos into your computer and email them to the person or people in them - I found that people loved receiving these past memories. It takes time to scan in, but sharing them as you go on is fun and motivating and enables the next step.
5.Create albums on your computer. This is easy. Find out how to move each photo scanned in to your computer into the relevant album(s). It’s easy to add titles and additional information to the photos. Albums can have the names of the categories you have already chosen AND on your computer each picture can appear as many times as you like! So it could be in ‘(child’s name) childhood’ as well as ‘Family together’.
6.Have closable folders with appropriate category labels and put the original prints into these folders.
(If you have amazing stamina and ambition you could then sort them out chronologically and stick them in albums with labels. I am NOT doing this! The children can receive the prints unsorted but without being lost in the hay stack of photos I had at the beginning)
7.When you’ve finished this process you have done the huge first sorting out process and should cheer a bit! Then you consult your children about how they would like to receive and keep the electronic versions of the photos you have in your computer albums. You can also at the first opportunity give them their own folders of childhood photos as prints.
8.Finally you can create a photo book for each child. I have made a selection from the computer albums for each of them, struggled a bit, and learnt how to go on line and make a photo album which will be printed, have hard covers, and be a wonderful gift for the adult child. I will have two copies made of each album, one for me and one for the adult child – when I die, they can have my copy too and pass both on to the grandchildren.
I hope this will help you avoid the time consuming mistakes I made and that you will enjoy handing on a manageable number of unique photos to your children and grandchildren. It’s a great gift to the next generations.