The Paint program is bundled with the Windows operating system. Thus although Paint is a fairly basic computer art program, it is widely accessible without neding to buy any additional software package.
Gransnet forums
Culture/Arts
Virtual art group Producing art using the Paint program
(71 Posts)Some people may not have used the Paint program previously, so here are some posts to help get you started.
To start the Paint program, type Paint in the search box, often at the lower left corner of the computer screen.
This may start the program automatically, or it may display a logo like an artist's paint palette upon which one needs to click.
It is best to make the application display to fill the screen if that has not already happened.
To get started, I recommend the following.
Start with File New, then to do File Properties so as to set the size.
I suggest setting the size to 7.25 inches wide, 5.25 inches high.
This so that a print could be trimmed to 7 inches by 5 inches and thus of a size that would fit a frame, sold by a supermarket for a 7 inch by 5 inch photograph.
In the event you may or may not want to print and frame what you produce, but making the picture this size means that if you do, then that can be done without needing to then try to resize the picture.
Having done File New and File Properties as mentioned in my previous post, the next step is to click on Home on the menu bar, then click on the word Brushes and a drop down menu should appear. To get started, choosing the one that is lowest down on the drop down menu is good, choosing it by clicking on it. This is the watercolour brush.
A black filled circle should appear on the white canvas, this can be moved around, without making a mark, using the mouse or trackpad.
Unless you want to use black paint, move the filled circle to the right and up, and when the filled circle goes off the canvas, it turns into the pointer,
Move the pointer onto the colour palette and click on a colour of your choice, and then move the pointer back onto the canvas, where a filled circle filled with that colour should be being displayed, yet not marking the canvas.
Remembering that the canvas is 5.25 inches tall, regardless of how big it is actually shown on the screen, move the filled circle over to the left, in a bit from the edge and around one and a half to two inches up from the lower edge of the picture, that is, about a third of the way up the canvas from its lower edge.
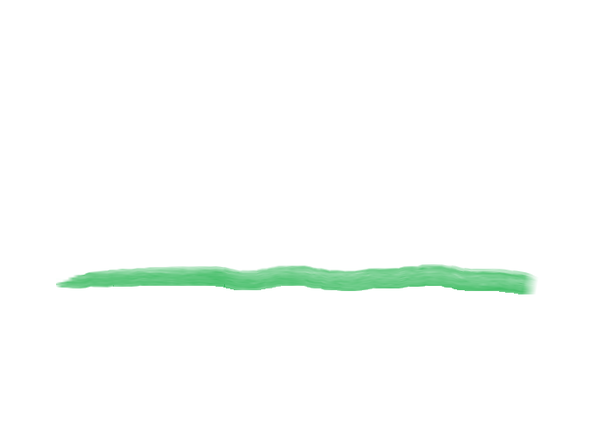
Click on the mouse and hold down and then drag across the screen to the right, then release the mouse button.
If you don't like the result, then using CTRL Z on the keyboard will delete it and you can try again if you wish.
The result I got is shown. I have been able to conserve what I produced by using File Save and I saved as a png file. The png means Portable Network Graphics.
Then one can gradually build up a picture by choosing different colours and drawing different lines.
One does not necessarily need to start off with a white canvas, it is possible to change the colour of the canvas before starting to paint a picture.
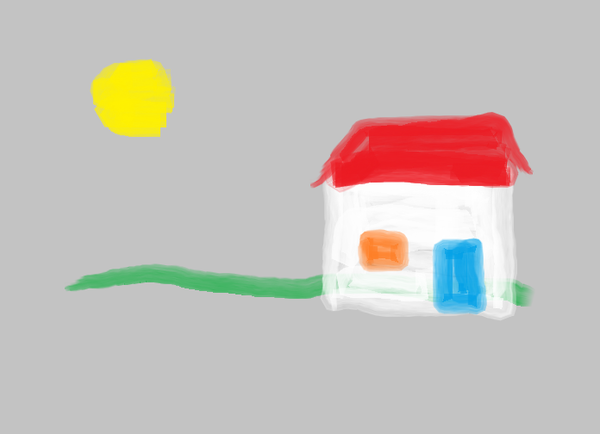
For this picture, having started off with File New and File Properties, before using the watercolour brush I used Home and then I clicked on the paint bucket that is in the middle of the upper row of logos in the group of six logos that is to the left of where one chooses a brush.
I then moved the pointer over to the right and I clicked on the Grey 25% colour square, which is in the lower row, second from the left, next to the White colour square.
I then moved the pointer onto the canvas, whereupon the pointer turned into a paint bucket with paint tipping out of it.
I then clicked on the canvas, and the whole canvas turned grey.
So then I chose the watercolour brush and produced the picture.
Readers are invited, if they so choose, to post their own art made using the Paint program.
I suggest that the ambience of this thread is to not be critical of what is produced and published, as the idea is to produce something and then, having done that, start a second picture and have another go, gaining experience as you go.
So a positive ambience.

Here is a picture that I produced yesterday evening.
It is interesting in that it uses three different brushes.
The horse (except for the eye) and the sun using the Crayon. (middle row, second from left in the brushes drop down menu on this computer)
The horse's eye using the one labelled just Brush, which is top row, leftmost.
The lavender using the Calligraphy brush 1, which is top row, leftmost but one.
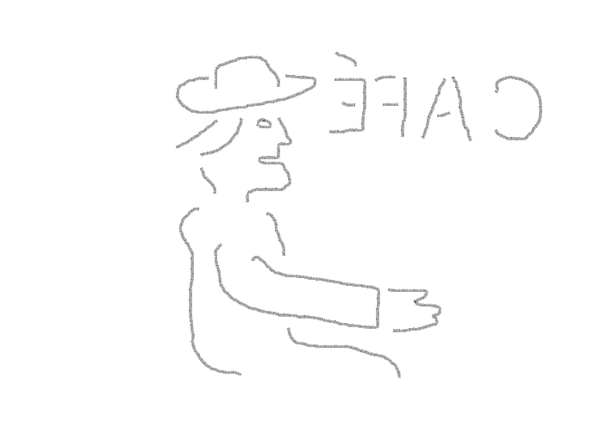
I have this morning tried producing a picture using the Natural pencil brush of the Paint program. The brush is in the middle row of the Brushes drop down menu, at the rightmost position.
I had never used the Natural pencil brush before.
I started with the dome of the hat, then I drew the rim. Then the man's hair, then the front of his face, then his eye. The eye seemed too low down, so I selected it and moved it upward using the arrow key on the keyboard. Then I drew the back of his head.
I then drew his arm, then I filled in the rest of the outline of his body, then I added his hand.
Then I added the lettering. It is back to front, to indicate that he is inside the café, the lettering being seen the right way round by someone in the street outside the café.. I drew the lettering by hand, not so as to be as if a technical drawing of the signwriter's work, but as if an artis's sketch, as the artist sits at another table in the café.
I used the Natural pencil as it is upon being chosen.
I have, since completing the picture, that one an change the colour of the pencil. Also one can change the thickness of the line using the Size drop down menu.
Something really good these days is that one can get one-off custom greetings cards made from your own artwork by uploading an image file to a website of a business that provides this service, fill in some details, pay a fee and the card will be sent by Royal Mail, either to yourself or to someone to whom you choose to send the card.
The cards can be produced full field, which is like cards bought in the shops wher the picture goes to the edge of the card. This is achieved by printing onto card a little larger than the finished product, then chopping off what is known the bleed area.
Requirements as to size of artwork vary from site to site, as does whether the card has a matt finish or a glossy finish.
However, as an example, here is a picture that could be used for an A5 size portrait orientation card, with a 3mm bleed area at each edge of the artwork, though chopping will only be on three edges as the other edge is the fold in the greetings card.
So A5 portrait is 148 mm wode by 210 mm high.
So, addong a 3 mm wide bleed area at each edge is 154 mm by 216 mm.
So, having started the Paint program, we do
File New to get a picture of some size, then we do
File Properties and on the dialogue panel that becomes displayed, we choose Centimetres, because millimetres is not an option, and we set the width to 15.4 cm and the height to 21.6 cm.
This has the effect of making the canvas area of the picture larger than the screen.
So we can do
View Zoom out to get the whoe canvas displayed on the screen.
If using the picture that you draw to produce a custom greetings card, you may need to export the image as a jpg file, sometimes listed a JPEG file.
This is because the sites are marketed to use images that are photos, which could have been taken using a digital camera or using the camera of a mobile phone. However, it is not a photograph as such that is printed, but a computer file that contains the information of an image, so the image can be one produced on a computer.
So this example uses a jpg file.
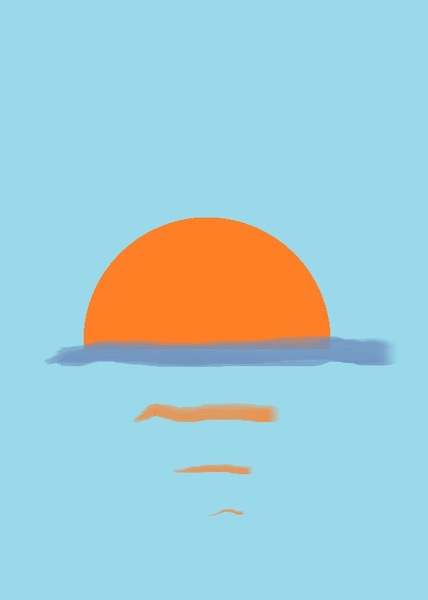
The picture uses an orange circle, with a rectangle of a different colour drawn over its lower half. This allows a semicircle to be filled with orange. The rectangle is then filled with orange so as to absorb the lower half of the circle, then the rectangle is filled with the same colour as it was drawn, then the rectangle is filled with the background colour, thus leaving the filled orange semicircle alone on the background colour.
Then the watercolour brush is used at various thicknesses to complete the picture.
The picture is then saved as a jpg file.
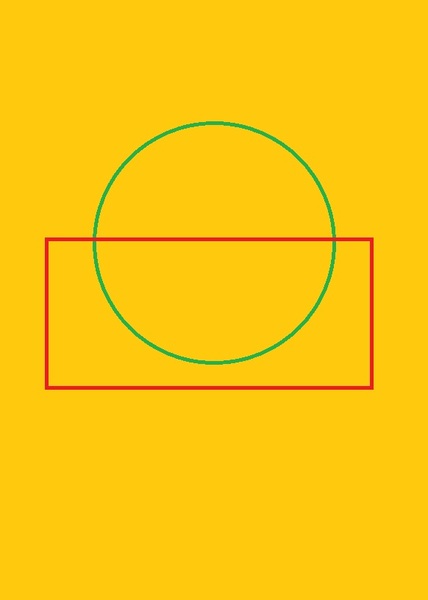
Further to my previous post, here is a picture to illustrate the construction to produce a filled semicircle that I decribed.
The circle was produced by using the shape that is described as an Oval, and ho;ding down the Shift key of the keyboard while drawing. The drawing being by clicking on the Oval in the Shapes selection area then clicking on the canvas and dragging the pointer to the right and down, releasing the mouse button before releasing the Shift key.

This picture was produced using Calligraphy Brush 2.
The variations in the thickness of the lines is produced automatically by the Paint program.
I took several attempts to draw some of the letters, simply using Ctrl Z one or more times to remove the line or lines of the letter.
Indeed I had done the first line, but the result looked as if it were going downhill, so I wiped it out and started again.
Also, in order to have space for the third line of text I moved two lines both upward on the canvas, and then I moved the second line closer to the first line.
After all three lines of text were drawn, I moved the whole of the text a little to the right.
I then added the flourish. A change of colour for the flourish, the flourish took two attempts to draw.

For this picture I first constructed the red face, then I selected it, copied and then pasted a copy and moved it to the right of the original image, doing that three times.
Then I copied the whole row and pasted it and positioned it below the first row. I then moved the whole collection of eight faces upward and to the left to produce a good result.
I then used the Edit Colours facility to produce, one by one, seven custom colours, bright colours as I wanted to produce a pop art effect.
Nothing since last week ?
I'm very impressed with your art, StarDreamer, although I'm not the least bit artistic and certainly couldn't grapple with the Paint program.
What is the equivalent program on iPad ?
Not since Wednesday of this week.
Nobody else posted until now so I had put forward most of what could be put forward to provide an introduction of how to get started using the Paint program.
Maybe nobody is interested, maybe some people have started to use Paint privately, maybe some people are already using other computer art software and that what I have written is at an introductory level when they are advanced users of more sophisticated software.
The Microsoft Paint program has far fewer facilities than some other graphics arts software packages, yet Paint is bundled with Windows and is thus readily available at no extra financial cost for people who are using a computer than runs on the Windows operating system.
Nevertheless I often use Paint as a convenient way to save a Print Screen image to a file.
I have put the thread on my watch list, so if anyone does post at some future time I should get an email about the post having happened.
Paint and brushes for me always
NittWitt
I'm very impressed with your art, StarDreamer, although I'm not the least bit artistic and certainly couldn't grapple with the Paint program.
Thank you.
If you would rather not, then fine, freedom of choice, yet if you would like to have a go but feel as if learning to use Paint is like a cliff in front of you, please feel free to post and I will try to guide you in as small-size steps as you need.
The ambience of the thread is intended to be upbeat, I can promise that I will not belittle anything you produce, that is simply not my style.
What I have done a number of times is to produce artwork (the term artwork is just what it is called, the word does not imply artistic merit anymore than the word poem implies literary merit), upload it to the web, get a one-off custom greetings card with the picture on the front printed and sent to me via Royal Mail, then I frame it in a frame (sold as a photograph frame) delivered to me with my grocery, and so I have a framed print of my artwork. Not a print as in "art print" but nevertheless I have enjoyed doing it. On the inside of the greetings card, where a greeting would usually go, I add a title for the picture, some descriptive text, my name and the date, and that is then printed when the card is produced.
There are a number of businesses that produce such one-off greetings cards. A web search should locate several in the United Kingdom. They vary in size of card and the finish (as in matt or glossy). Typically they are marketed as photocards as expecting the picture to be a photograph. However, what is actually used is a computer file, so as long as the file type is correct, it can work fine. The one I use is happy for me to use my own artwork rather than a photograph and indeed the people on their online chat line have advised me on various points so as to enable me to do so.
aggie
What is the equivalent program on iPad ?
I don't know, I don't have an iPad.
Some time ago I bought a 7 inch tablet computer, just a very basic one running the android operating system so as to have the expewrience of using a tablet computer with a touchscreen and I was able to download a free basic painting program where one uses a finger or a passive stylus to draw on the screen.
Maybe someone reading this thread who knows about iPad software will advise.
MrsKen33
Paint and brushes for me always
That's good. I considered geting some paint and brushes but I have not done so as yet.
As far as I know, at present computer art cannot do the texture that some types of paint van produce, though maybe 3d printing technology could be used - perhaps it already has been.

I like paint and brushes too , this is acrylic paint
aggie
I like paint and brushes too , this is acrylic paint
Thank you for posting.
How big is the canvas please?
Are those Dawn Redwood trees in winter?
It’s 12 inches by 10 inches , it’s snowdrops under local trees , in Northern Ireland, not redwoods
Thank you.
I used Paint when I was teaching - easy to use to make or edit diagrams. I used it more recently when I wanted to edit pixelated diagrams to use in knitting patterns.
There used to be similar programmes on the old Macs - drawing and painting. Unfortunately they tend to “improve” these programmes and make them so complicated that they’re difficult to use.
aggie
It’s 12 inches by 10 inches , it’s snowdrops under local trees , in Northern Ireland, not redwoods
Thank you.
I wondered about how the picture would be framed.
I found this web page, which has a lot of information about framing.
www.best4frames.co.uk/blogs/picture-frame-sizes
Join the conversation
Registering is free, easy, and means you can join the discussion, watch threads and lots more.
Register now »Already registered? Log in with:
Gransnet »